Getting started
From install to first audit in under five minutes.
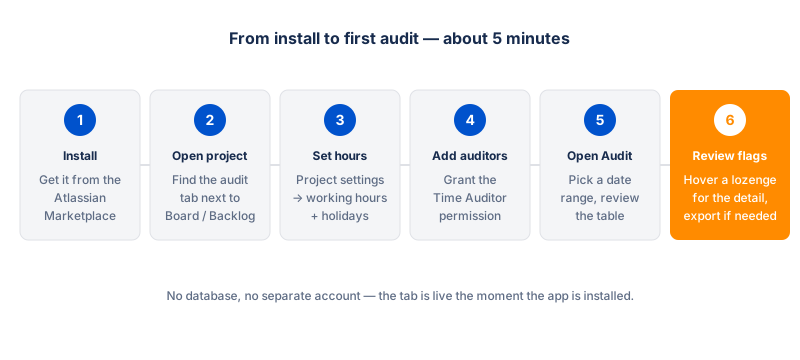
1. Install from the Atlassian Marketplace
- Find Fairlog on the Atlassian Marketplace and click Install.
- Choose the Jira site to install on and confirm the permissions. Fairlog requests read scopes (worklogs, issue details, user info, sprints), Forge storage, and one external egress to the public Nager.Date holiday API — see the Privacy page for the full list.
- Wait for the install to complete. Fairlog appears as a new tab next to Board and Backlog in every Jira project on your site, and a Timer panel on every issue.
2. Open the Fairlog tab
- Open any Jira project.
- Click the Fairlog tab in the project's left-hand navigation (next to Board / Backlog).
- You'll see the My Time view by default — your own worklogs and internal-activity entries for the current week, in a flat sortable table. This is what every logged-in user sees.
To see the team-wide audit view with flags, Worker
column, member filter, analytics tabs and exports, you need auditor
access — see step 3.
3. Grant auditor access (project admins)
Auditor access is granted entirely through Jira's standard permission system — there are no app-managed allow-lists.
- As a project admin, open Project settings → Permissions.
- Scroll to the Time tracking permission group.
- Find the Time Auditor permission and grant it to a project role or group (e.g. Developers or Scrum Masters).
- Jira site admins are always auditors in every project — no grant needed.
See the permissions page for the full step-by-step, including the guest-user caveat.
4. Configure thresholds, internal categories and working hours (project admins)
- Open Project settings → Fairlog (visible to project admins only).
- Adjust the suspicion thresholds (gap hours, batch minimum count, batch window, minimum hours, duplicate window, outlier multiplier) — each has an inline explanation and example.
- Optionally set Hours per story point for the estimate-mismatch check. Leave empty to skip it.
- Define your internal-activity categories (e.g. Meeting, Training, Admin) with colours and optional period limits — see Internal activities.
- Set the default weekly schedule and seed the public holidays for your country so the Team capacity tab has a baseline.
- Save. The cache regenerates on the next view.
See the settings page for every field and its default.
5. Run your first audit
- Open the Fairlog tab in a project where you have auditor access.
- Pick a date range or a Scrum sprint from the filter bar.
- Use the member filter (round avatars for small teams, dropdown for larger teams) to narrow down to one person or the whole team.
- Scan the Flags column — lozenges appear on any entry that matched a suspicion rule. Hover a lozenge to see the detail. There are eight signals; see Flags.
- Switch to the Team capacity tab to see planned-vs-actual utilization and a run-rate forecast.
- Click the three-dots menu → Export to CSV (the filtered worklogs) or Export audit log (CSV) (the mutation log for compliance).
Don't have any flagged entries? That's normal — Fairlog is
deliberately quiet. It only flags entries that exceed your thresholds;
if your team logs time consistently, the table will be clean. Lower
the thresholds on the settings page to increase sensitivity (and
false positives).
6. Use the timer (everyone)
On any Jira issue assigned to you, the Timer panel lets you start a stopwatch, pause for interruptions, and stop to file a real Jira worklog — see Timer.